
How to Set up Your Kontos Wallet & Deposit Funds

In this article, we’ll explore how to set up your Kontos Wallet and deposit MNT tokens to your Kontos account on the Mantle chain using your Bybit Web3 Wallet.

How to Set Up Kontos Wallet
Method 1: Set Up Kontos Wallet via Desktop Browser
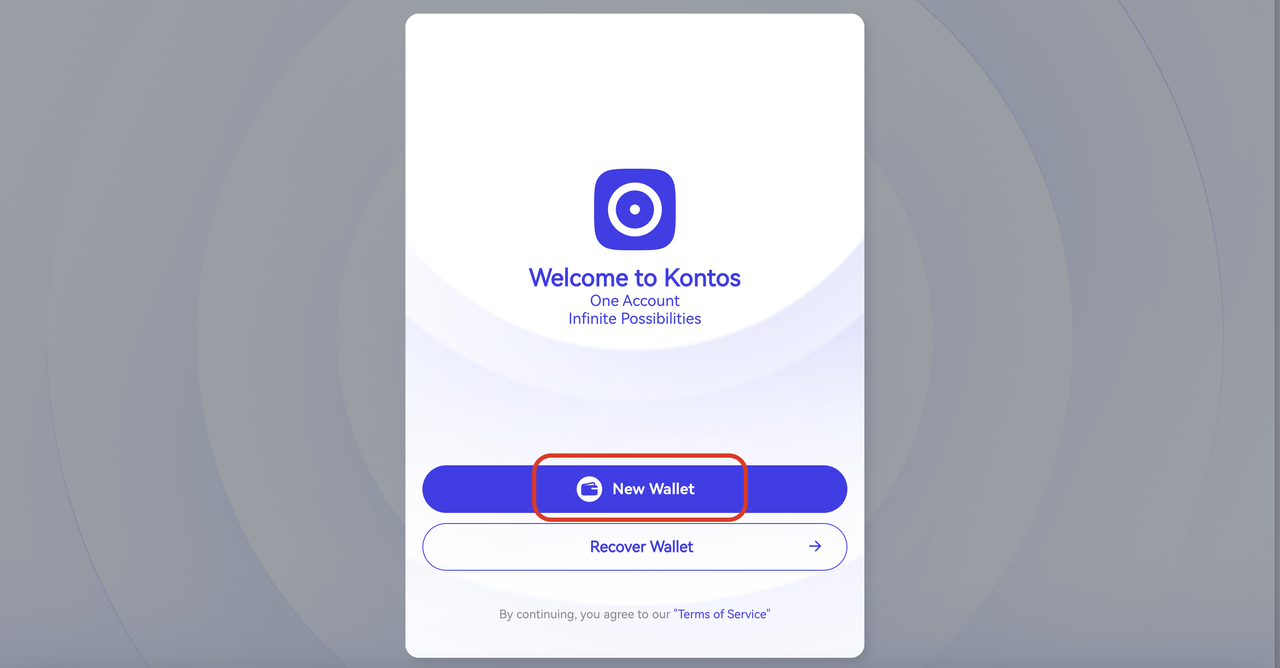
Step 1: Navigate to the Kontos Wallet website and click on New Wallet.
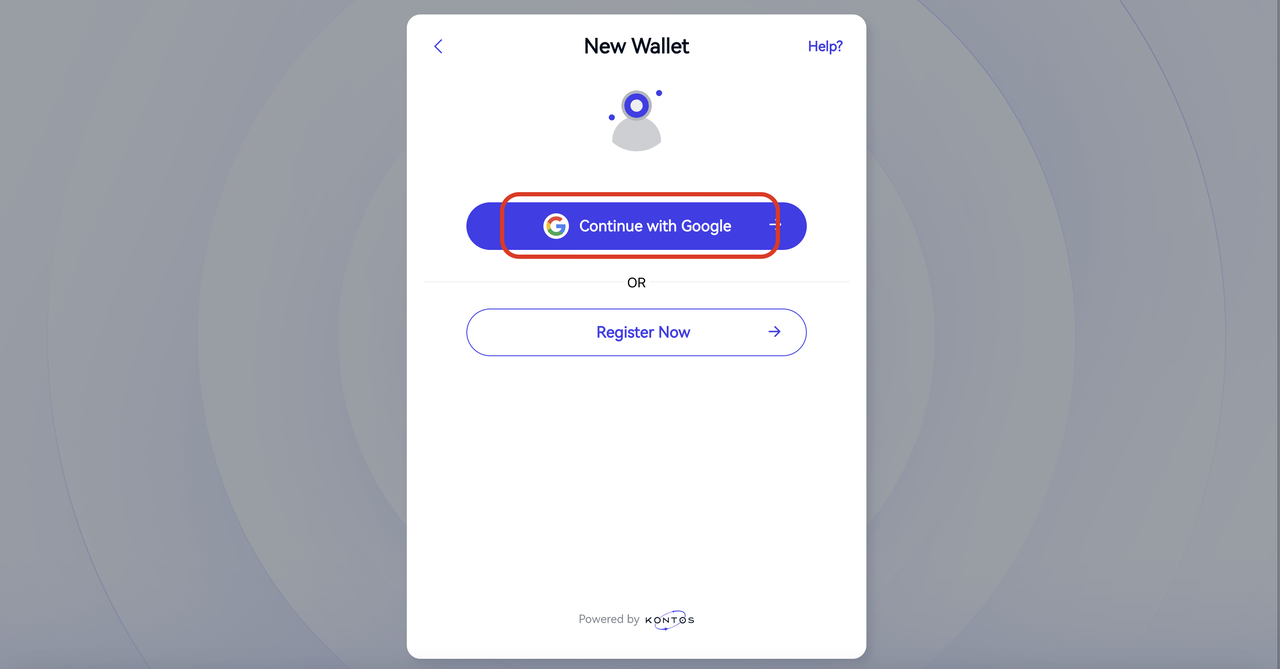
Step 2: Click on Continue with Google to register your Kontos account using your Google account details.
Note: You can edit your Gmail security settings later. This allows you to change your security email or add more Gmail accounts to enhance your account security.
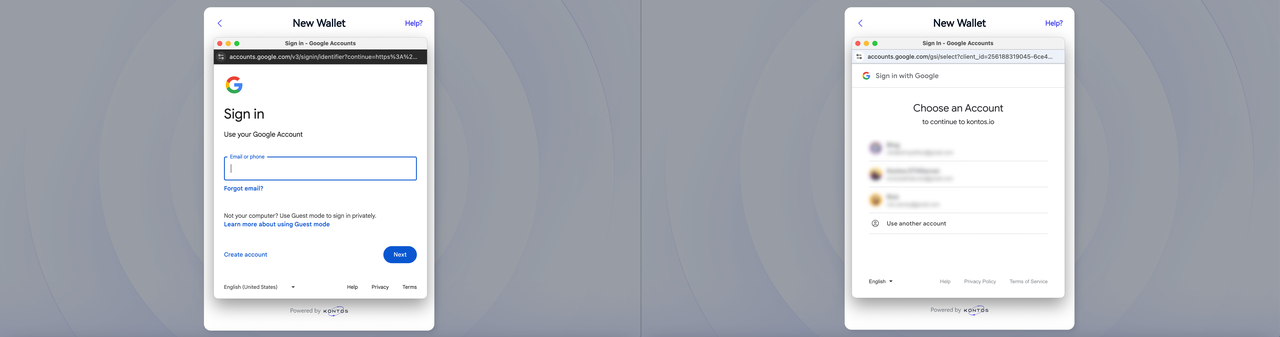
Step 3: Choose to either log in to your Gmail account, or select a Gmail account that’s already logged in.
Step 4: Enter your preferred account name and click on Next.

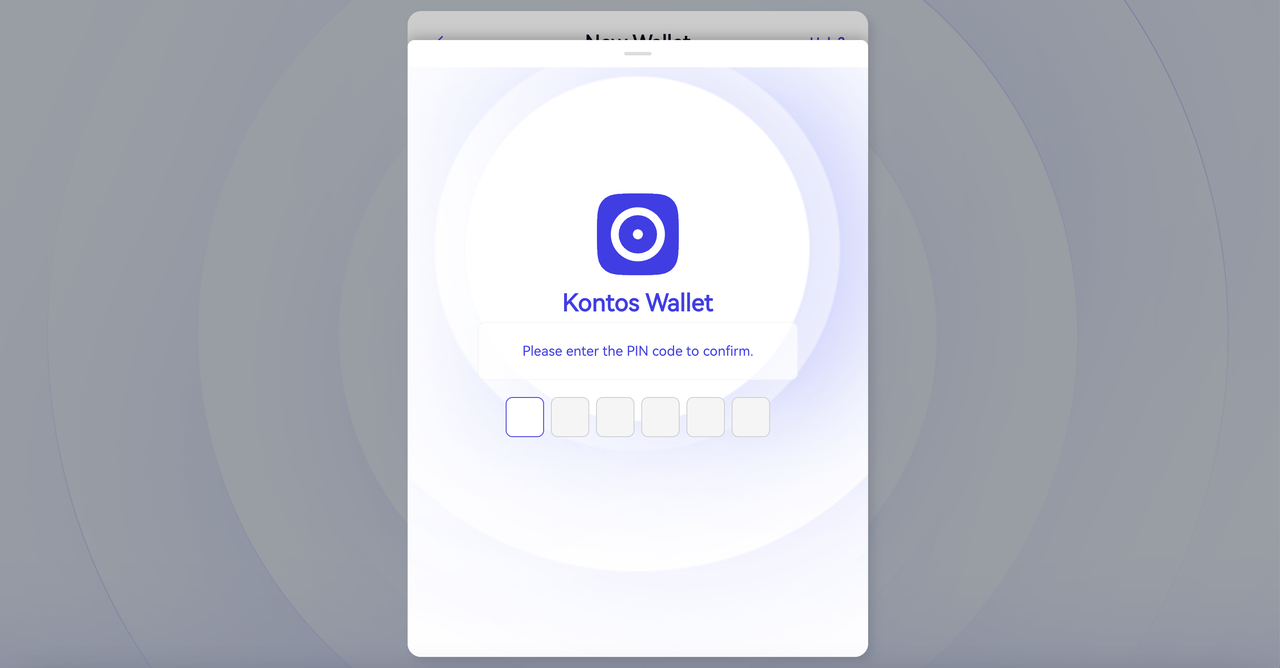
Step 5: Set up a PIN code. The purpose of this is to prevent unauthorized access to your wallet.
Notes:
The PIN code will be used to unlock your wallet in the future.
If the PIN is entered incorrectly 10 times, the wallet will be reset.
In case of a reset, you’ll need to recover your wallet using the Gmail account you used to register your Kontos account.
Choose a PIN code that you can remember, but that is difficult for others to guess.
Never share your PIN code with anyone.
Step 6: Enter your referrer’s name. If you don’t have one, or prefer not to use one, simply click on Skip.

Congratulations! You’ve successfully created your Kontos Wallet!
Method 2: Set up Kontos Wallet via Bybit Web3 Wallet
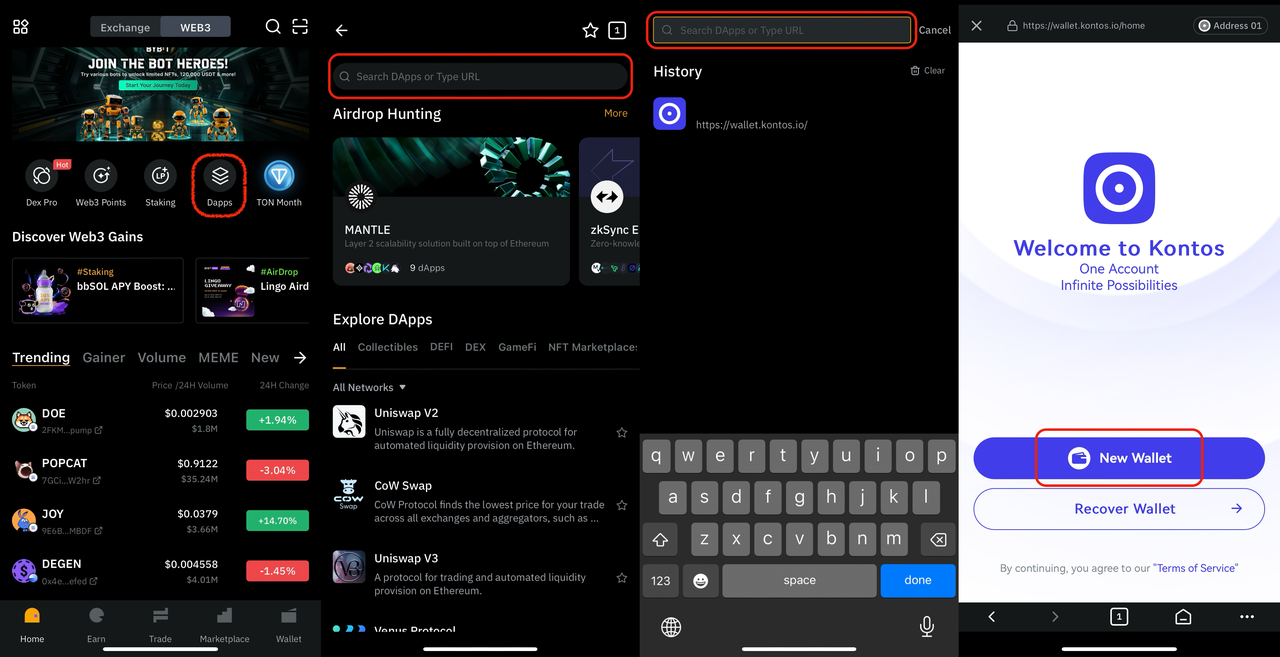
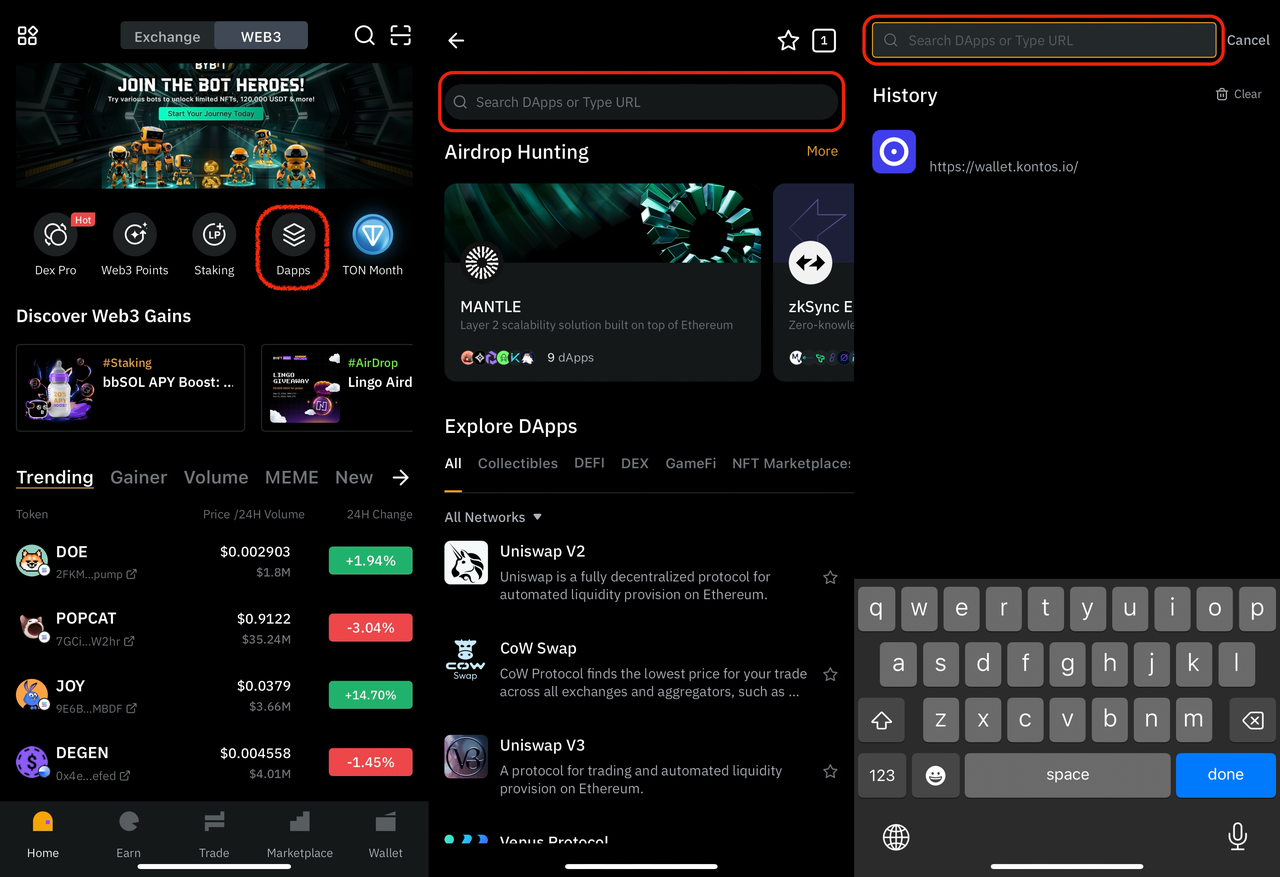
Step 1: Open your Bybit Web3 Wallet and tap on DApps. Then, in the search field, enter https://wallet.kontos.io/ and tap on New Wallet.
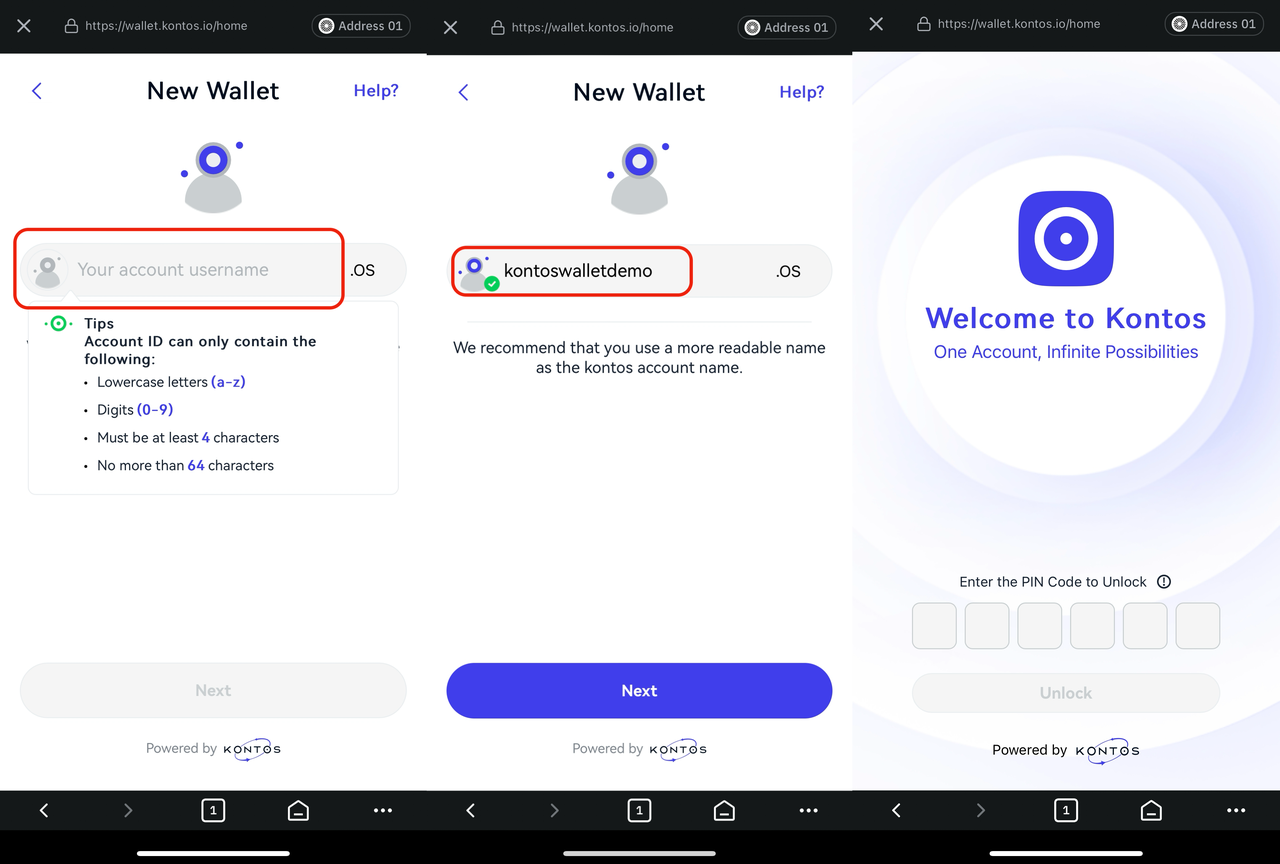
Step 2: Enter your preferred account name and set up a PIN code. The purpose of setting a PIN code is to prevent unauthorized access to your wallet.
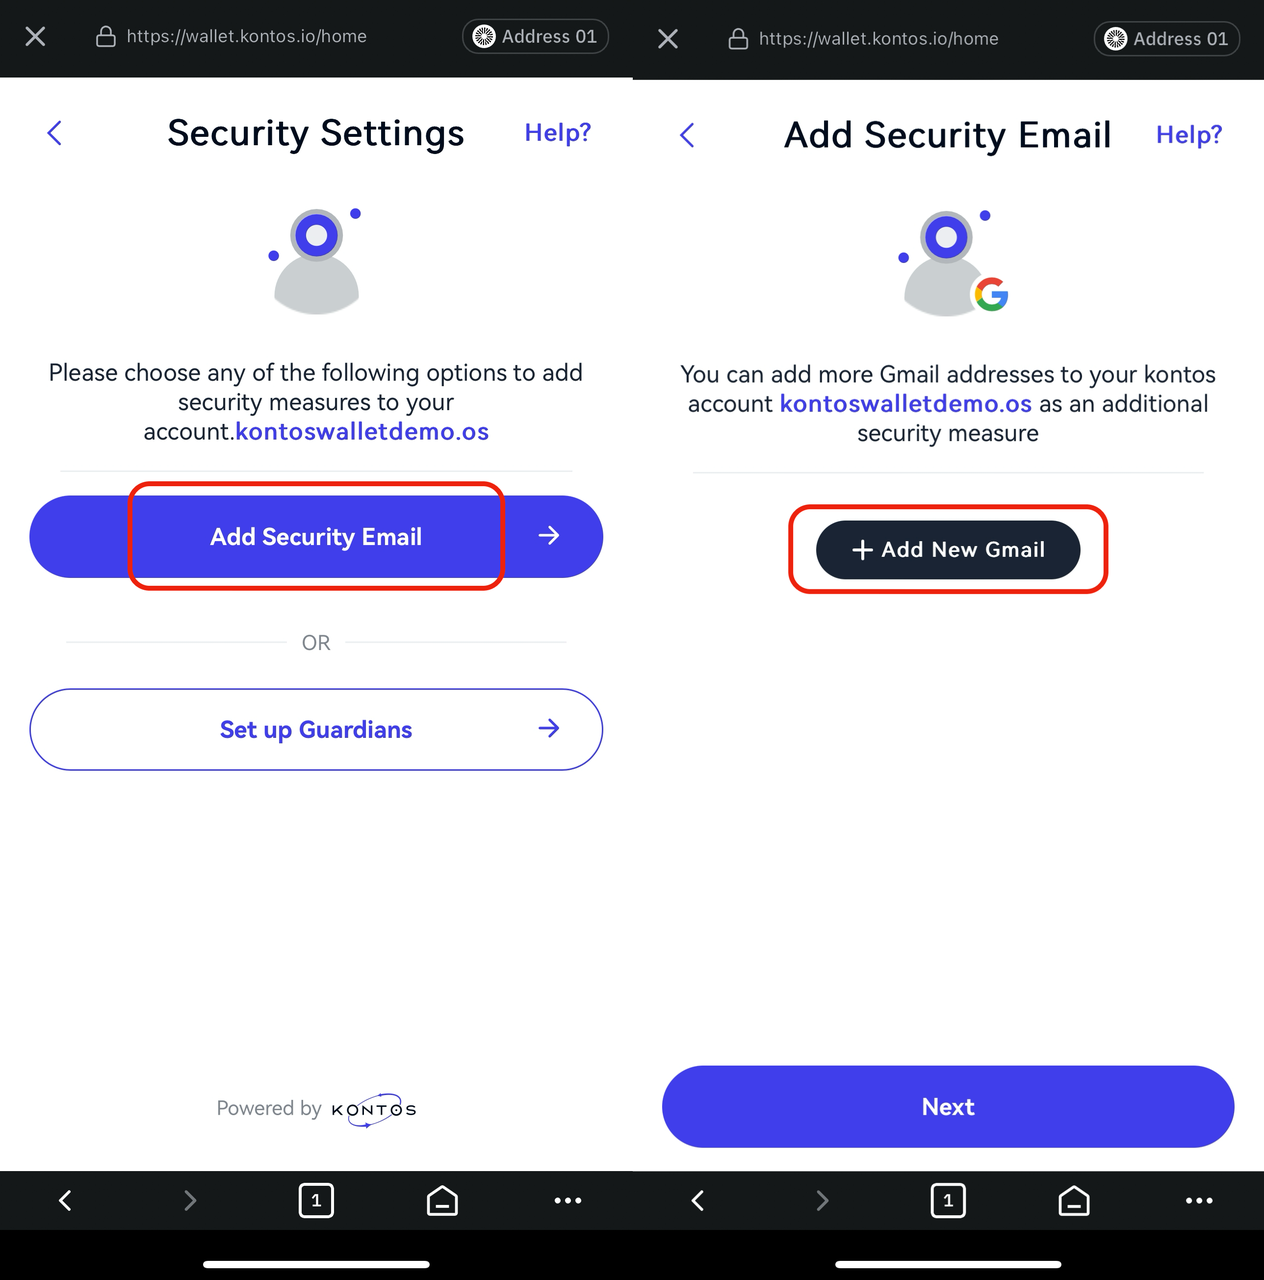
Step 3: Tap on Add Security Email, followed by Add New Gmail.
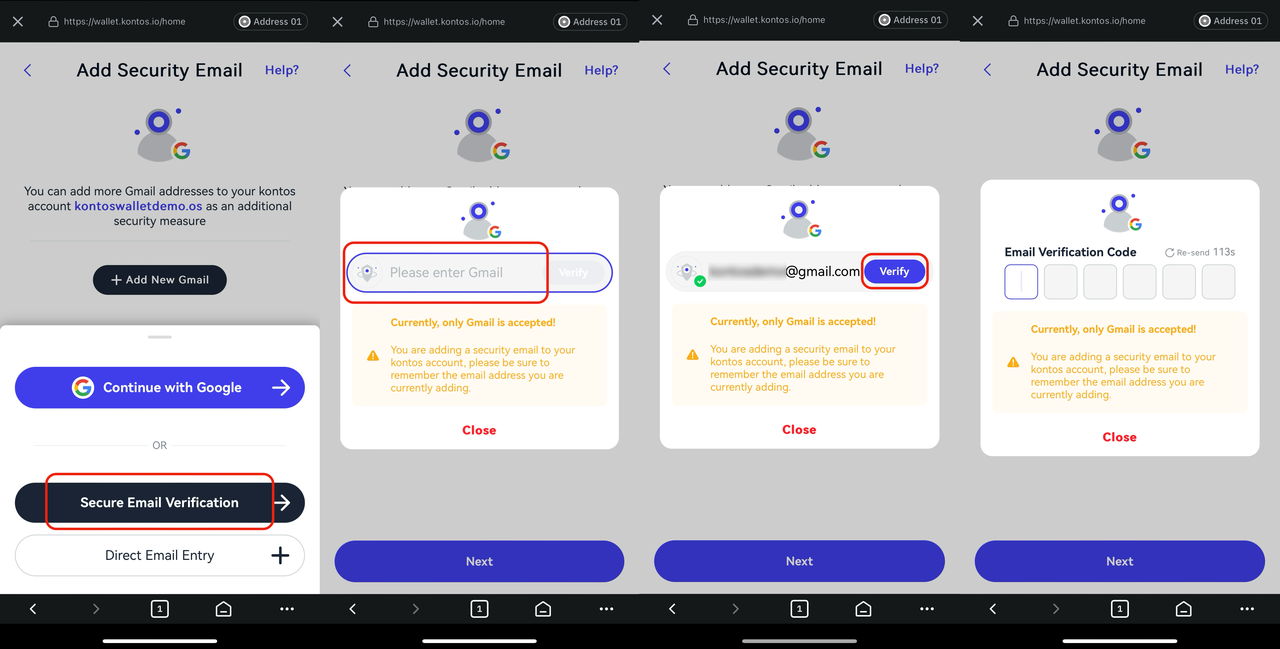
Step 4: Tap on Secure Email Verification and enter your Gmail address in the provided field. Tap on Verify, and then enter the verification code that has been sent to your Gmail inbox.
Step 5: You can add multiple Gmail addresses as security email addresses by tapping on Add New Gmail. Then, set a recovery threshold for future account recovery. The threshold represents the number of email addresses required for recovery. Any combination of email addresses meeting the threshold can be used to initiate account recovery.
Note: The threshold system allows for flexible and secure account recovery. For example, if you set your threshold to two out of three added emails, any two of those emails can be used to recover your account.
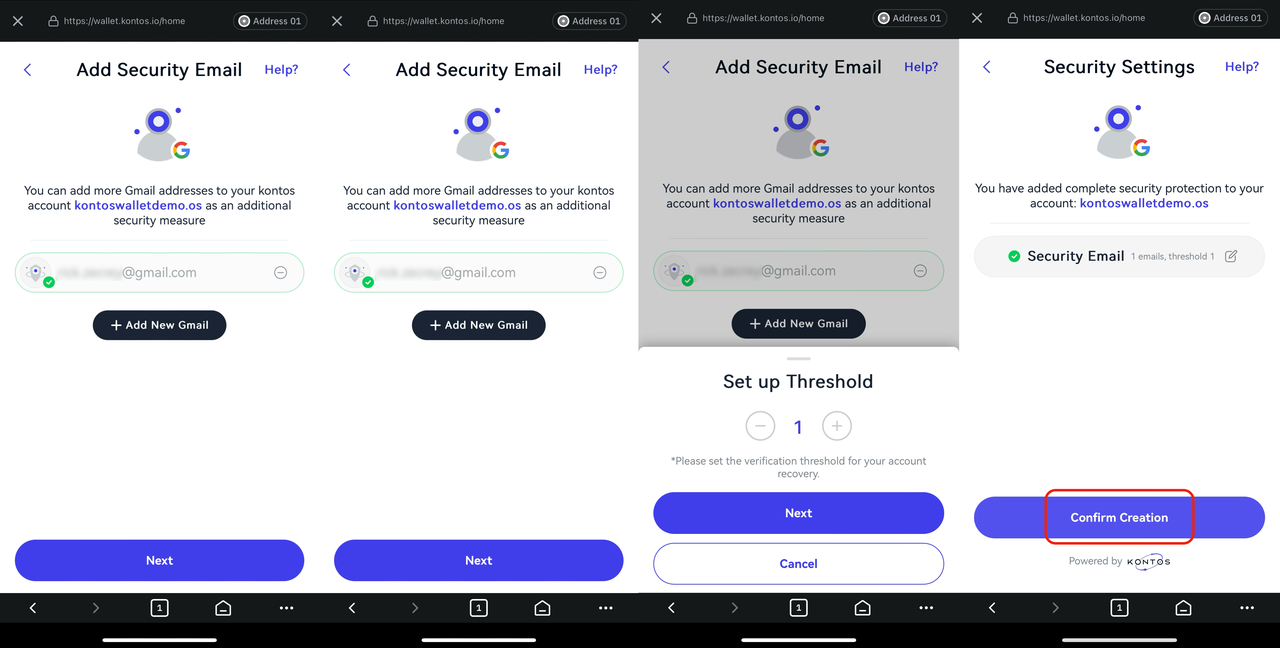
Step 6: Enter your referrer’s name. If you don’t have one or prefer not to use one, simply tap on Skip.
Congratulations! You’ve successfully created your Kontos Wallet!
How to Deposit at Least 10 MNT to Your Kontos Account on Mantle Using Bybit Web3 Wallet
Method 1: Deposit MNT Via Bybit Browser Extension Wallet
Step 1: Open your browser with the Bybit Web3 Wallet extension installed, and visit the following link here.
Note: The above URL is pre-configured with specific parameters for your deposit task:
It’s set for the Mantle chain (chainID = 5000).
The address is pre-filled.
The amount is set to 10 MNT.
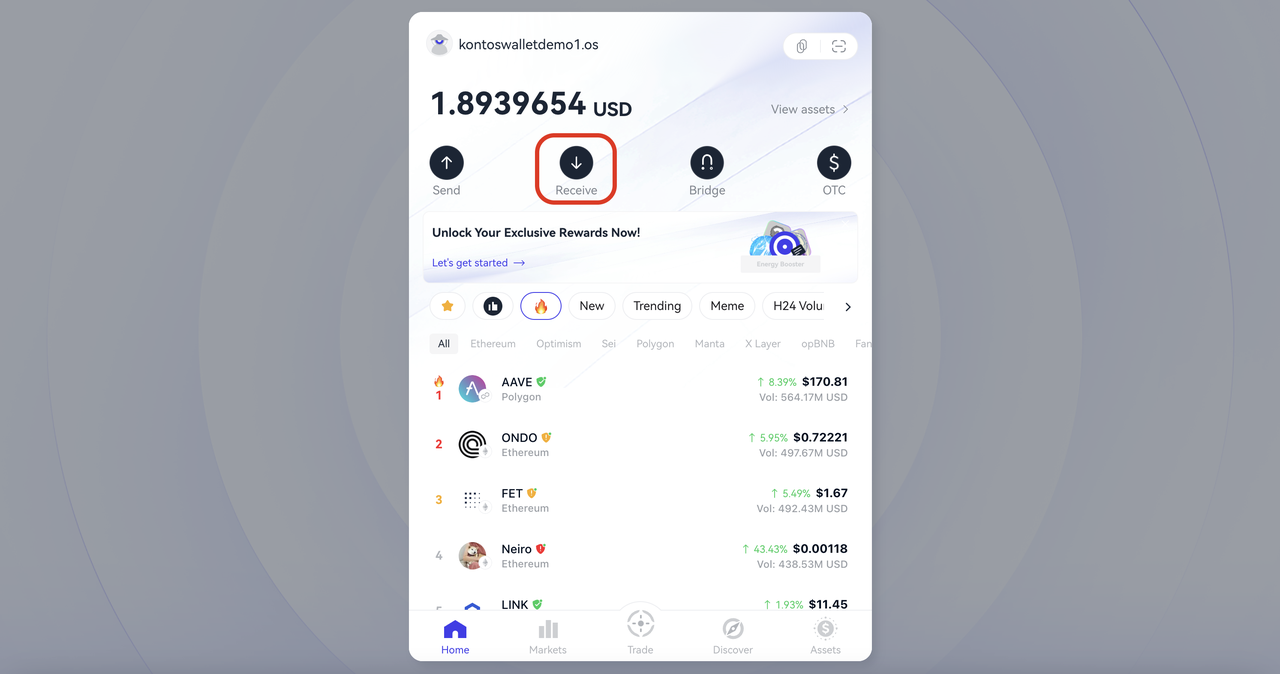
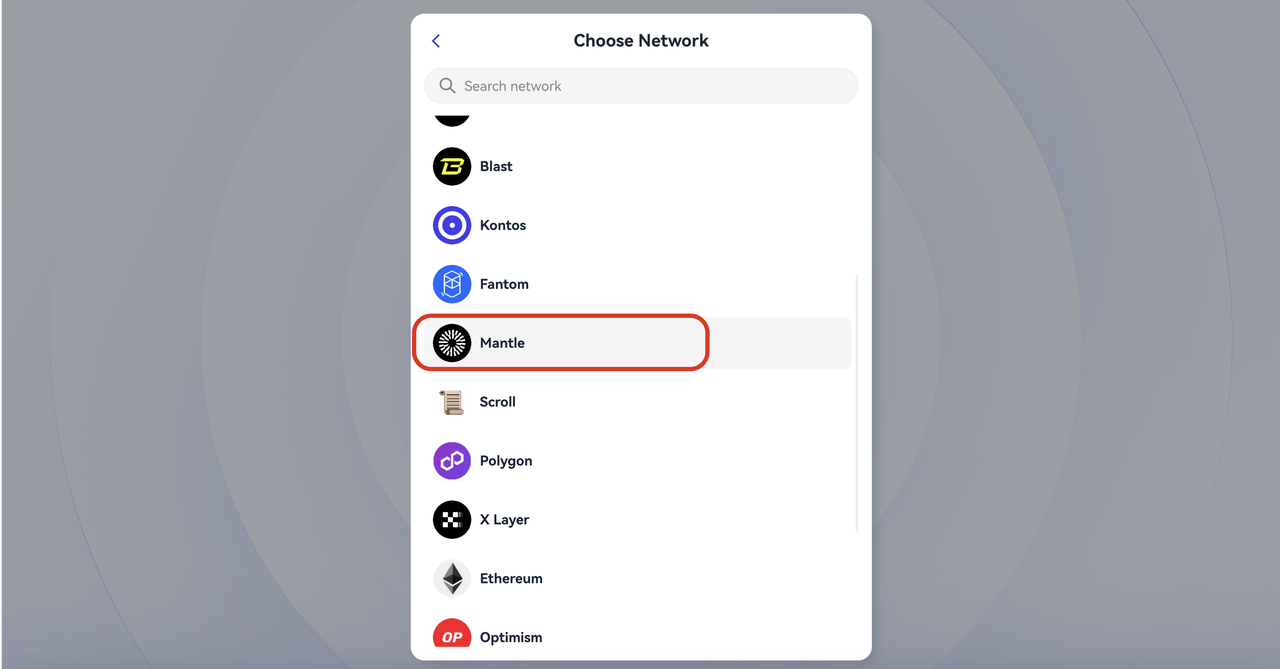
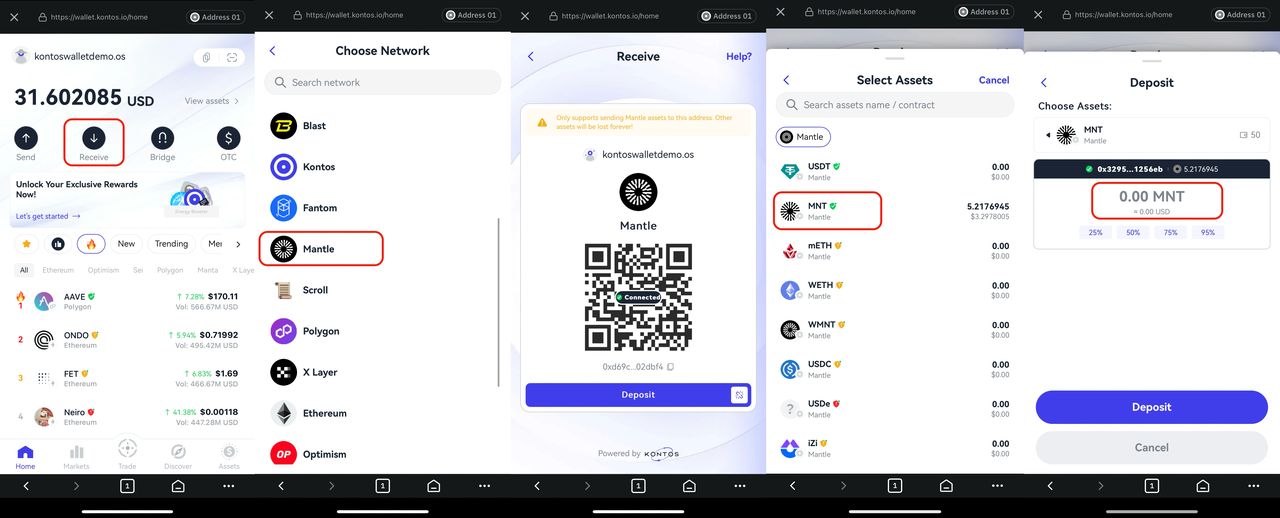
Alternatively, you can also navigate to the Kontos Wallet homepage and click on Receive. Then, under Network, select Mantle.
Step 2: Click on Connect Wallet, and select Bybit Wallet.
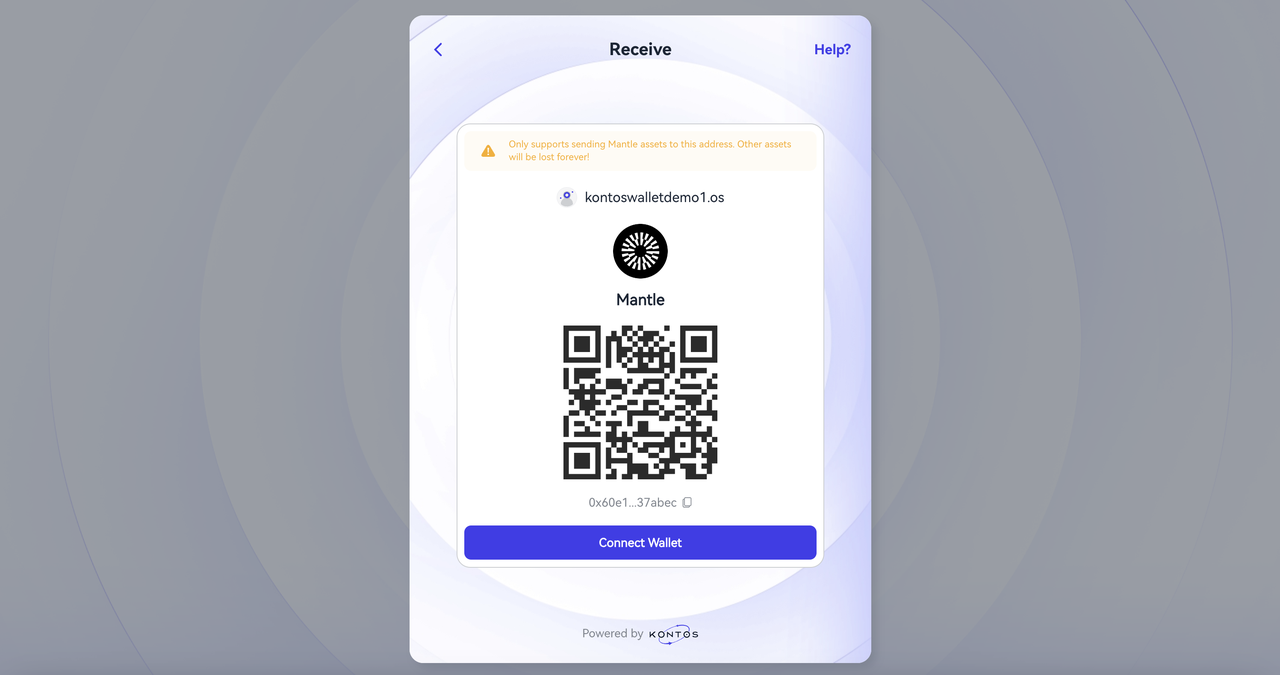

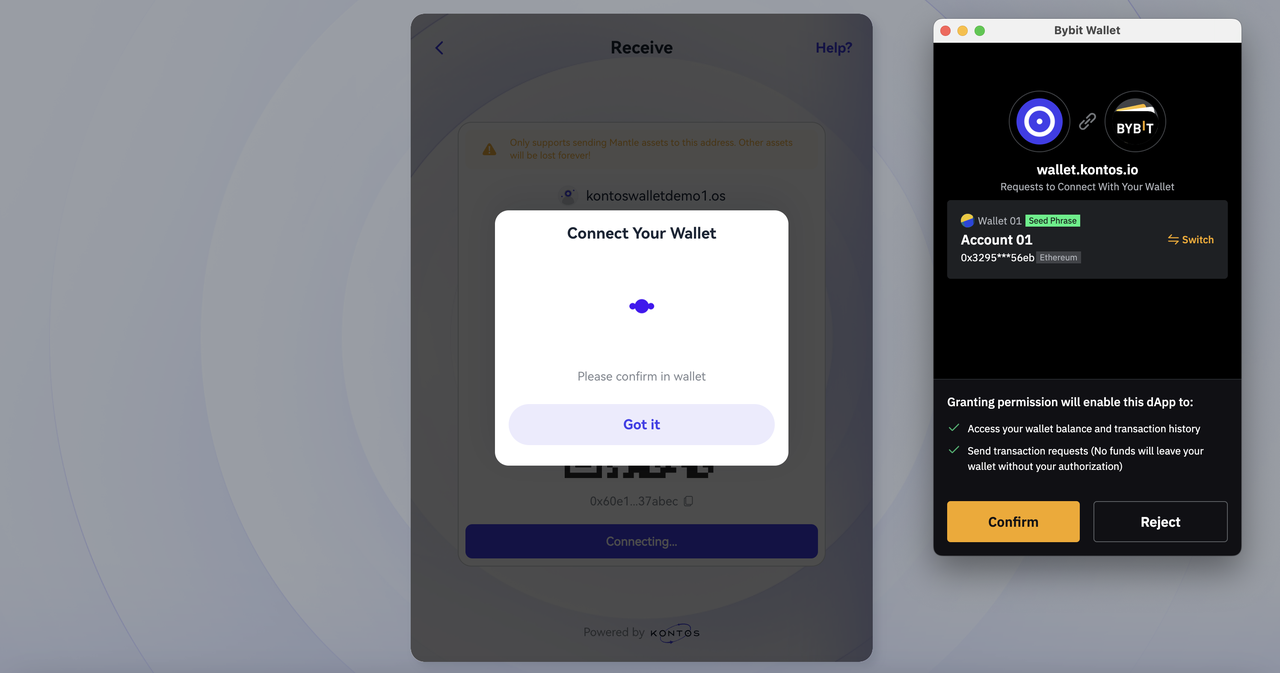
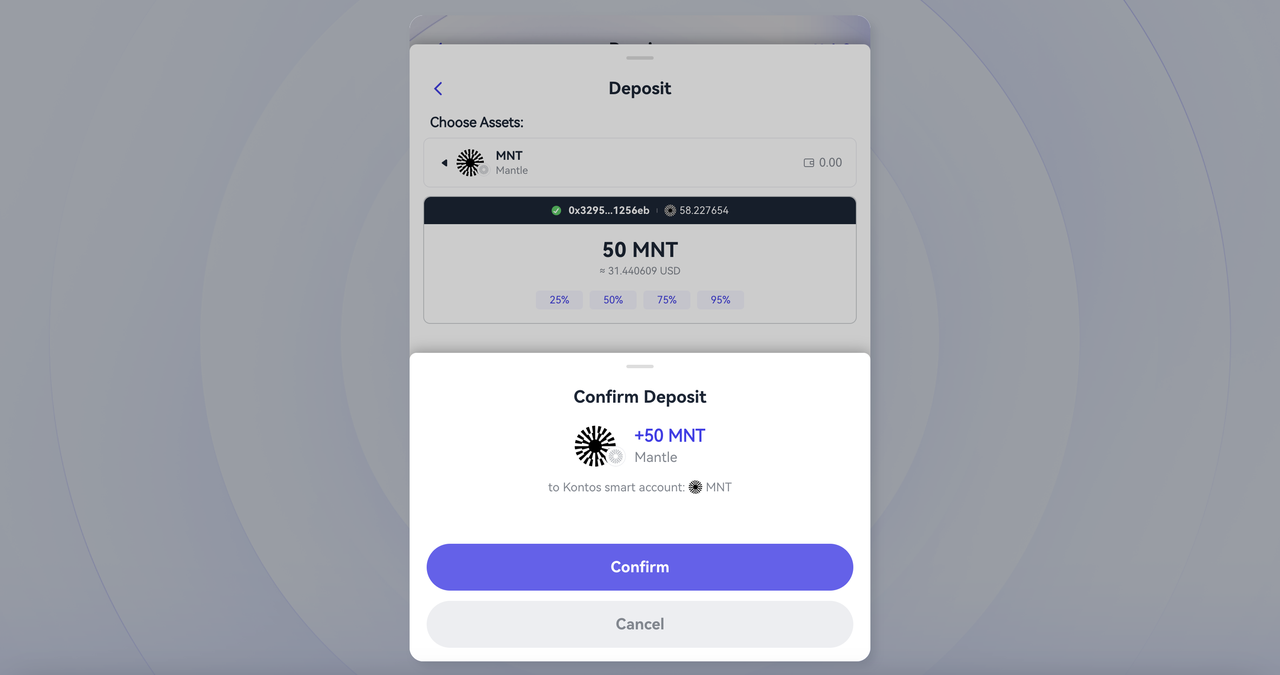
Step 3: Click on Deposit. If you access the page through the pre-configured URL, you’ll see the amount of 10, along with the asset (MNT) to deposit already listed.

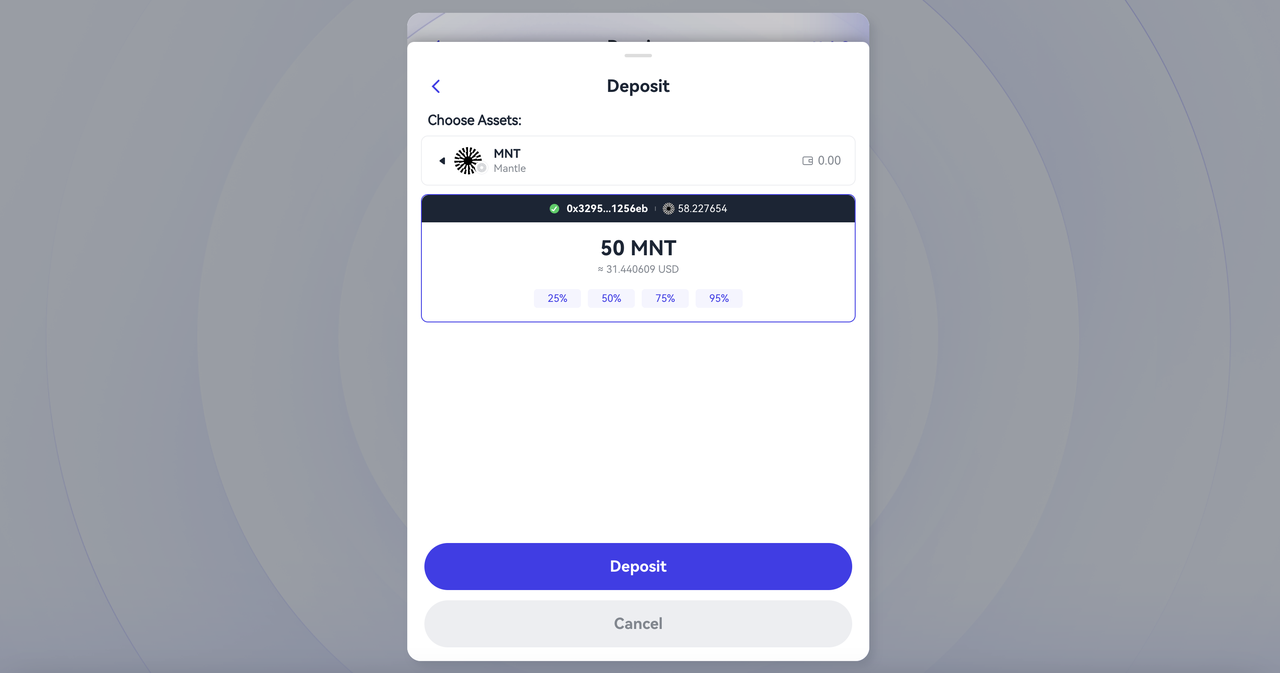
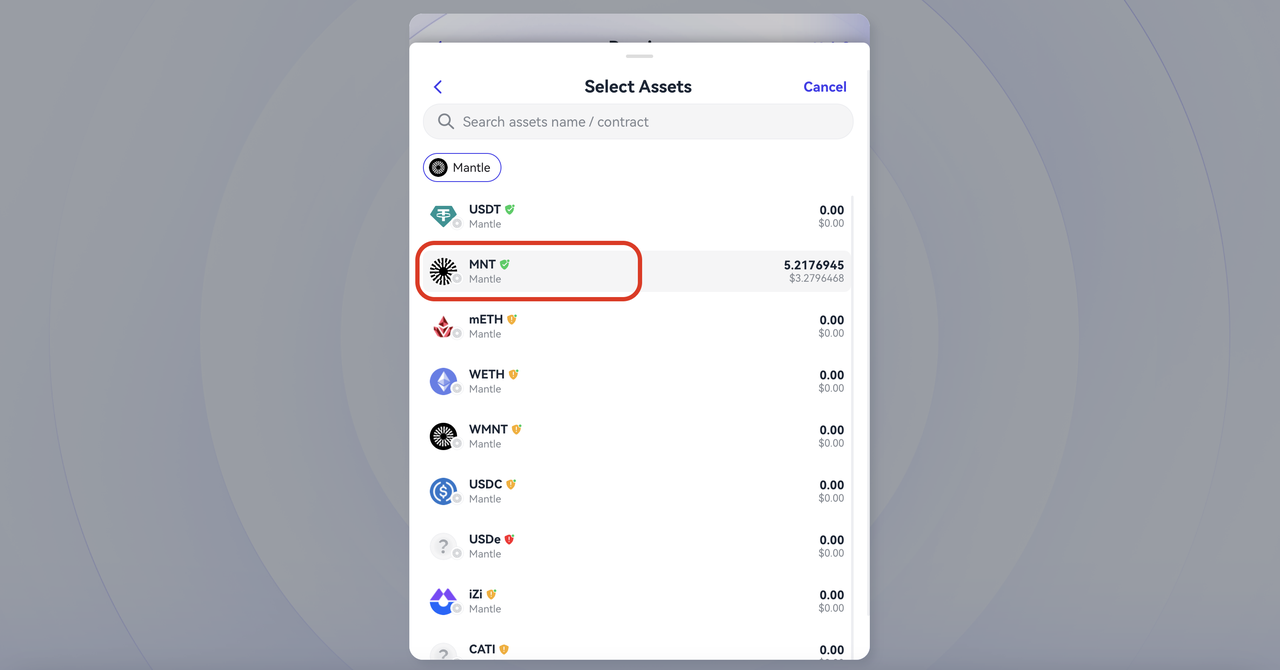
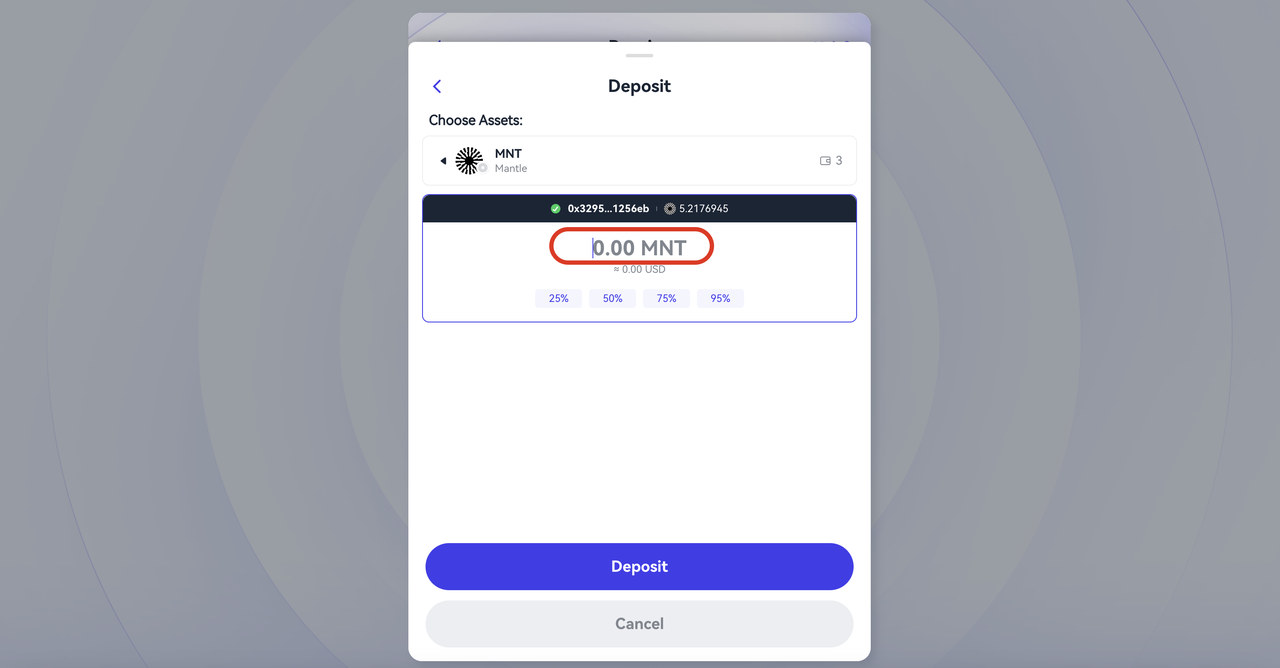
Note: If you accessed the page through the Kontos Wallet homepage, you’ll need to choose MNT as the asset to deposit, and then input an amount greater than or equal to 10 MNT.
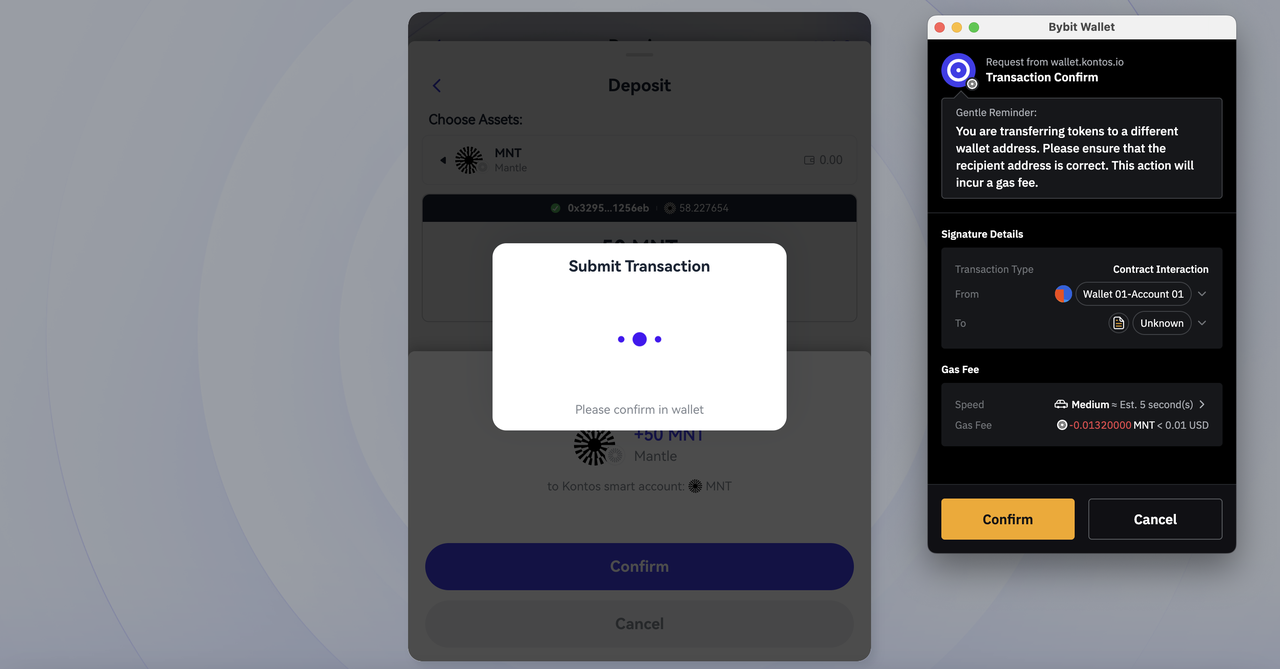
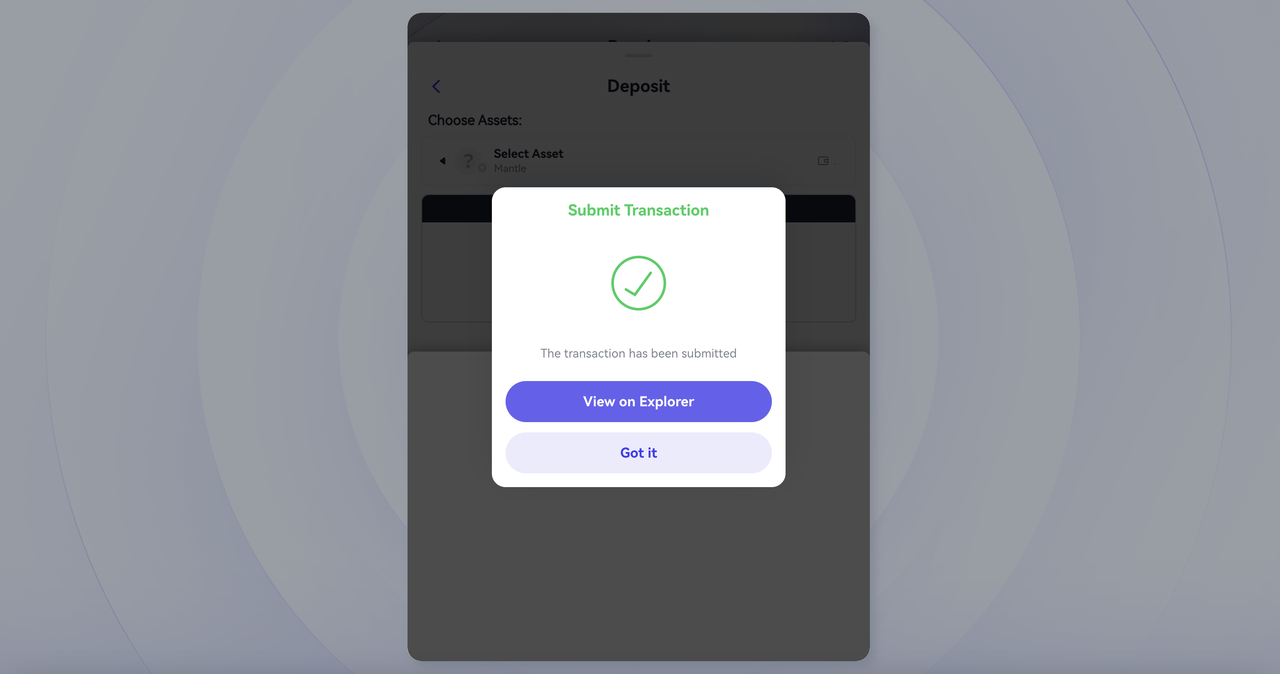
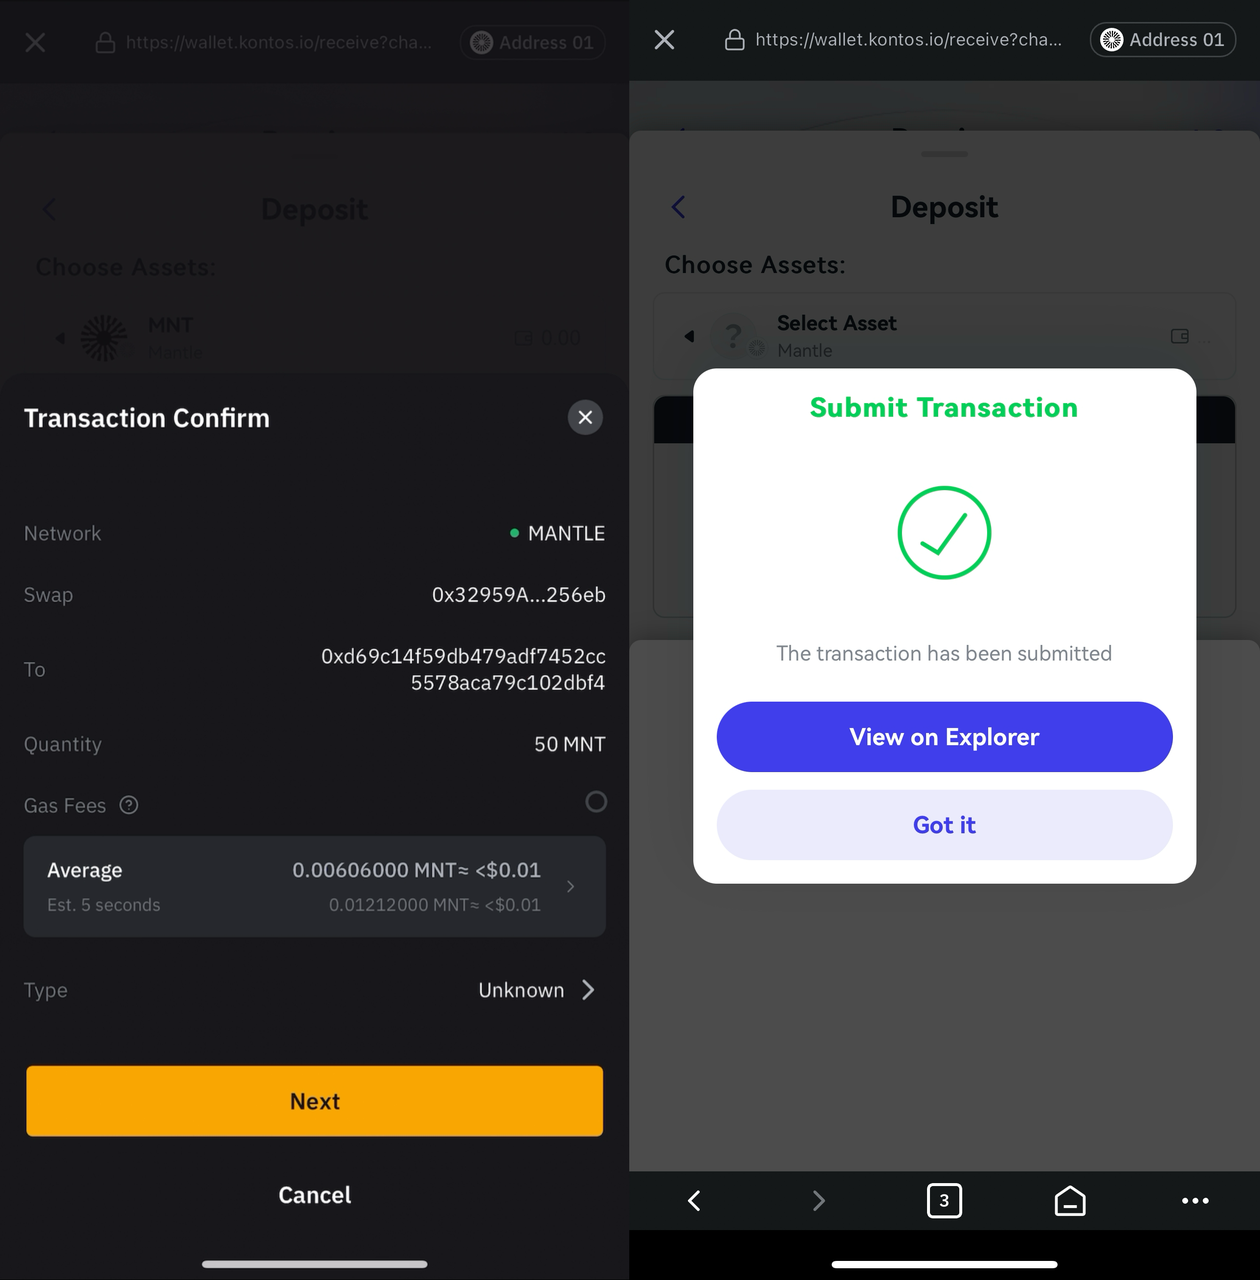
Step 4: Click on Deposit, and then on Confirm. Next, approve the transaction in order to complete the deposit process.

Method 2: Deposit MNT via Bybit Web3 Wallet
Step 1: Open your Bybit Web3 Wallet and tap on DApps. Then, in the search field, enter https://wallet.kontos.io/receive?chainId=5000&address=0xEeeeeEeeeEeEeeEeEeEeeEEEeeeeEeeeeeeeEEeE&amount=10000000000000000000&decimals=18&connector=bybit (see Note below for pre-configured link), and tap on New Wallet.
Step 2: Connect your Bybit Wallet and ensure that the Mantle chain is selected. Then, review the deposit details and tap on Deposit to confirm and proceed with the transaction.
Note: The above URL is pre-configured with specific parameters for your deposit task:
It’s set for the Mantle chain (chainID = 5000).
The address is pre-filled.
The amount is set to 10 MNT.
Alternatively, you can also input https://wallet.kontos.io/ in the search field and tap on Receive on the Kontos Wallet homepage. Select the Mantle chain from the network options, and select MNT as the asset. Then, enter an amount greater than or equal to 10 MNT to deposit.
Step 3:Confirm the deposit.
Congratulations! You’ve successfully completed the task of depositing at least 10 MNT into your Kontos Wallet from your Bybit Web3 Wallet!
#LearnWithBybit